Synology Out Of Band Management Guide
Allowing you get back in, when everything crashes
How to Set Up Out-of-Band Management on a Synology NAS
If your NAS ever goes unresponsive, loses network access, or won't boot properly, DSM itself won't help you. You can't log into a web interface that isn't there. Out-of-Band (OOB) Management gets around that. It's a lightweight, separate system built into supported Synology units that you reach over SSH through a dedicated Management port, completely independent of DSM. You can restart the NAS, power it on or off, and pull system logs even when the OS is down.
What you need
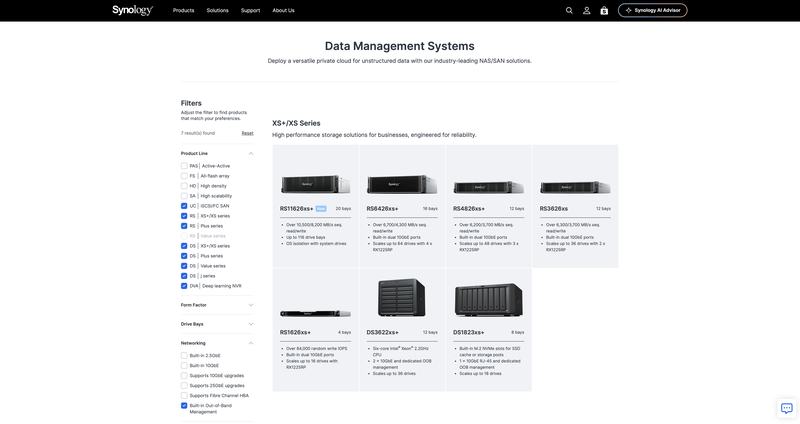
- A NAS model with a dedicated Management port - Models
- DSM 7
- An SSH client (Terminal on Mac/Linux, or PuTTY on Windows)
Turn it on in DSM
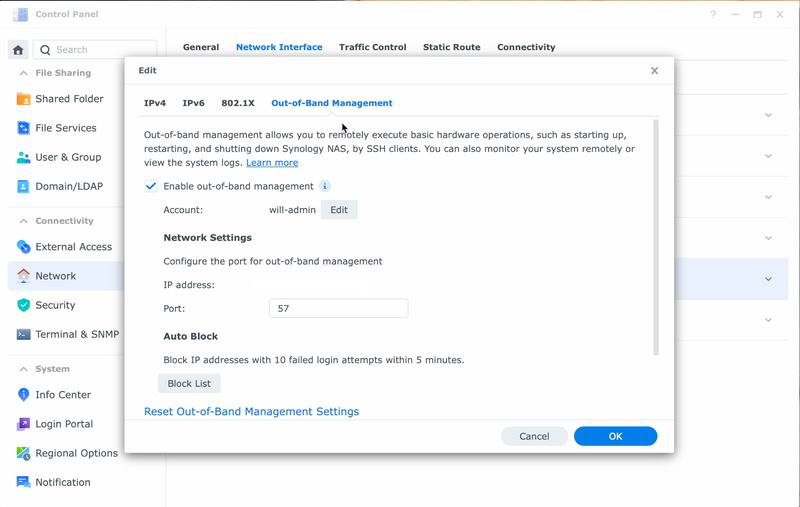
- Open Control Panel > Network > Network Interface
- Select LAN Management (Out-of-band) from the list, then click Edit
- Switch to the Out-of-Band Management tab
- Check Enable out-of-band management
- Set the account you want to log in with
- Under Network Settings, set the port you'll SSH into (this is separate from your regular SSH port)
- Click OK to save
Plug an ethernet cable from the Management port on the back of the NAS into your switch. This is a physically separate connection from your normal LAN ports. (says MGNT on the back of it)
Connecting over SSH
Once it's enabled, you'd expect this to just work:
ssh your-admin@your-nas-ip -p [your port]
On a modern Mac or Linux machine, it won't. You'll get this:
Unable to negotiate with [ip] port [port]: no matching key exchange method found.
Their offer: diffie-hellman-group14-sha1,diffie-hellman-group1-sha1
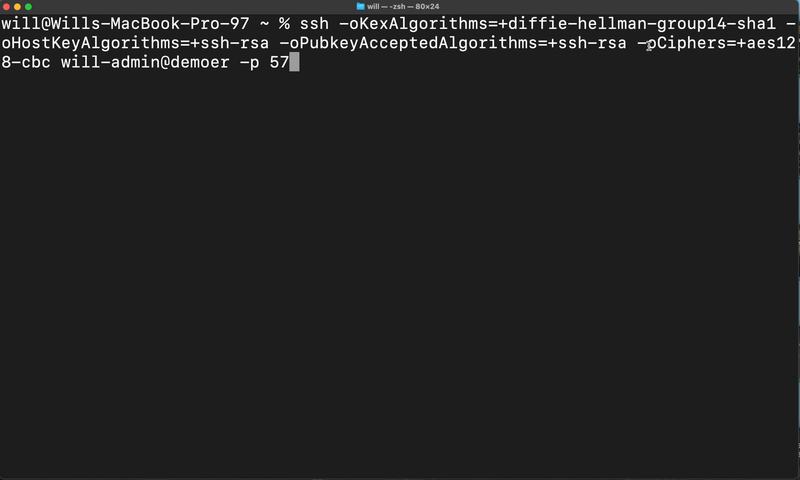
That's because the OOB console only supports older SSH algorithms that newer SSH clients disable by default for security. The fix is to explicitly allow them for this one connection:
ssh -oKexAlgorithms=+diffie-hellman-group14-sha1 -oHostKeyAlgorithms=+ssh-rsa -oPubkeyAcceptedAlgorithms=+ssh-rsa -oCiphers=+aes128-cbc your-admin@your-nas-ip -p [your port]
That connects you straight into the console.
What you get
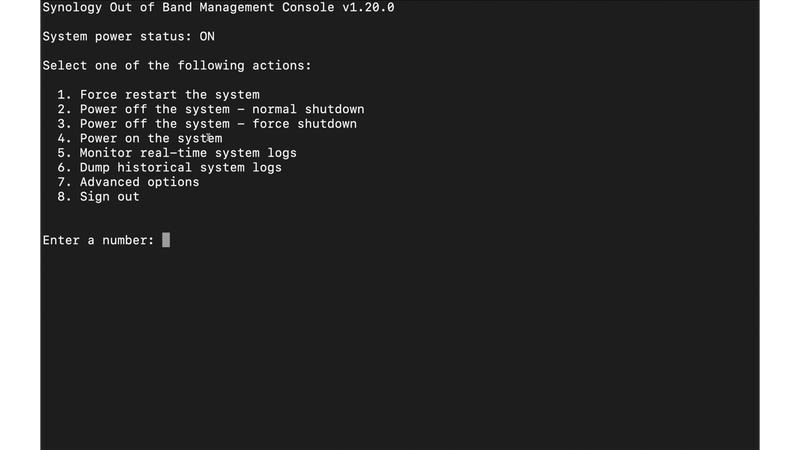
Once you're in, you land on a simple menu:
- Force restart the system
- Power off — normal shutdown
- Power off — force shutdown
- Power on the system
- Monitor real-time system logs
- Dump historical system logs
- Advanced options
- Sign out
It's basic, but it's exactly what you need when everything else is unreachable.